1.Take the images that you want to process under generate HDR, In the image below i shot 5 images with the camera bracketing shots at -2,-1,0,+1 and +2 so i had a well exposed image and then under and over exposed images giving me a good range of tones
2.Once you have clicked ok you get a menu where you can tick boxes for aligning image,reduce CA,reduce noise and ghosting and change white balance etc if needed
3,Once you click OK it will blend all the images together and come up with an image which looks truly awful-full of blocked shadows and blown highlights, but if you place the cursor over the image it will show you what the image will look like in the small window
4,Click on the Tone Mapping button
5, Now the image has been transformed,There are 2 tabs at the top 1 says Details Enhancer and the other Tone compressor, The detail enhancer gives a Paintery effect and the Tone compressor is more like a photograph, For the landscapes i took i quite liked the paintery effect as long as you don't over do it
6,The screen on the left gives a list of things to play around with so you can customise the image as you like, Once you have moved a slider you can either click on the 'show original' tab above the image to see what the image was like or just click on the go back button at the bottom to go to the previous setting,
7, Keep an eye on the histogram top left when making adjustments
8,You can click on the image and a loup screen comes up so you can take a closer look
9, Once you are happy press the Process button the image is ready to be saved
10, Open up in photoshop and finish levels,sat etc
The software is very intuitive and not expensive at $99
Its still early days for me using this but the results so far are OK
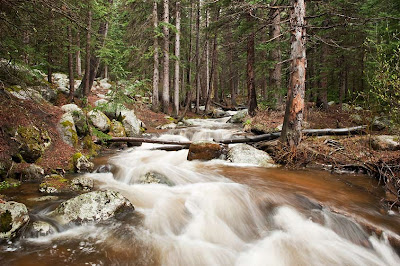
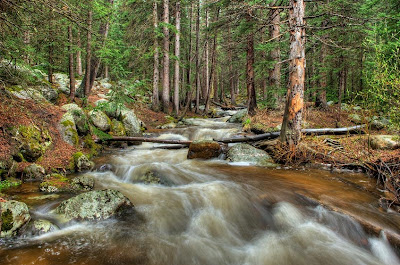
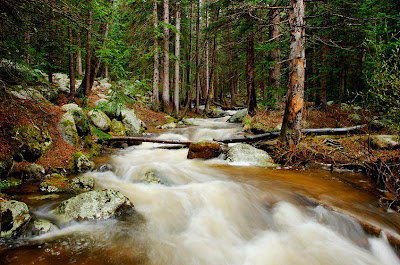
Here are 3 images
The first is normal processing in PS-No HRD
The second is HDR using Detail Enhancer (paintery effect)
The third is HDR using Tone Compressor


3 very different looking images from the same RAW files,HDR images can look very over done if you are not careful but like all processing if you are subtle with the changes it can really enhance your images
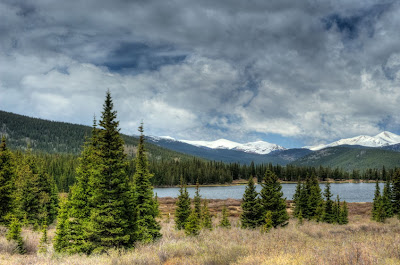
And here is an example of where HDR software comes into its own, Again in Colorado, I shot this scene but to stop the snowy mountain tops blowing out i had to under expose the foreground and the tree area was dark, If i had used the traditional ND Grad filter to even the sky and foreground out i would have ended up with the tops of the near mountains and the top of the trees darker than the rest which would have looked unnatural, By blending the images in Photomatix HDR software i now have detail in the sky/mountains and the tree/foreground area

Dave
No comments:
Post a Comment