Saturday 28 February 2009

Hardware-Hard Drives


With ever increasing mega pixels giving us larger and larger files, the PC hard drive soon fills up and every starts to run very sloooooooooooowly, which is a complete pain.

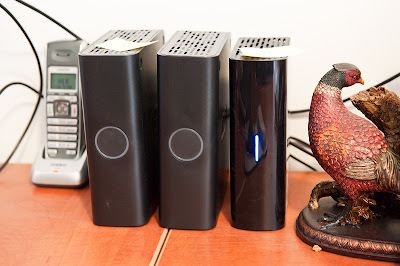
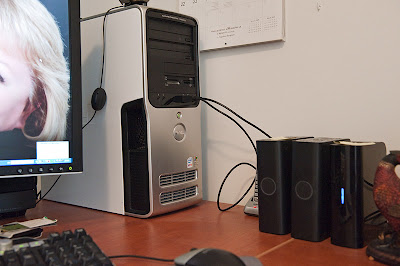
So what to do?- well the best thing is to take all your images off the PC and put them on an external hard drive. These have gone up in capacity and down in price over the last few years so there is no need not to have one. In fact you should have a minimum of two as you will need a back up just in case one of the drives fail, which in time it will- guaranteed.

I started by using Lacie 250GB hard drives and after a year or two, one failed so I replaced it and after a year or so the other gave up the ghost. Now this isn't a major problem as the images were always backed up. For the last couple of years I have used Western Digital 500GB external drives. These so far have been fine but they are nearly full so I have just added a 1TB drive and will replace the other 2 x500GB drives shortly, I like to be safe so I have a 1TB harddrive on my PC and a 1TB external drive added to this I have a back up drive and a back up of the back up which I keep off site just in case a scumbag decides he wants to take them whilst I am out or if the house should burn down I am covered-or at least the images are.

Over the top maybe but as I make a living out of photography I don't want to loose all the hard work and lovely images that I have captured over the years, I know some people burn them to disc but I have heard too many stories of DVD's corrupting over time so for now the external route is the way to go for me, Don't think it will never happen to you, PC's crash all the time and its very expensive to get somebody to recover data-easier to buy a couple of decent external hard drives and sleep at night
Dave

Friday 27 February 2009

More News - New Canon Tilt and Shift Lenses

OK - so this announcement is actually a couple of weeks old now, but Canon have announced two new lenses in their Tilt and Shift range here.

So what is this to do with wildlife photography I hear you ask?

Well let's just step back to Dave's recent post on being a wide boy and you can see the potential use - no more leaning trees due to converging verticals or bowed horizons, particularly if you are using a full frame body. I know this last bit to my cost with my 17-40 L lens on my old 5D when taking seascapes.

Now as you will see from the link, these are extremely expensive bits of kit and I will not be rushing out to add one to my inventory just yet, but of the recent Canon announcements it is probably the most relevant to us.

Martin

Thursday 26 February 2009

News - Adobe Photoshop CS4 Update

Adobe have announced an upgrade for CS4. It covers some major bugs like the clone/healing brushes being very slow. I downloaded it today and now works perfectly-Thank you Adobe-Full details are on Rob Galbraiths site.

Local Patch-Raleigh-Keeping an eye open


Winter is always a good time for bird photography, Not only are the birds on the look out for food to survive the winter- so easy to attract to your garden, Winter migrants come down from the frozen north to spend the winter in warmer climbs-and who can blame them, When i lived in Europe you could tell if there was going to be a harsh winter if flocks of Waxwings arrived, Well i have noticed a couple of groups of waxwings over the last couple of months but they dont seem to stay in one place for long and soon move on, On my way back from dropping my wife of at work this morning i noticed a flock of birds on my estate that looked from a distance like waxwings so i grabbed the binoc's and went and had a look-yep about 50 in a garden backing onto the church, I went and grabbed the camera and went back,I could see them sitting in the trees in lovely light but they were too far away so i went into the church where they were very close but badly backlit, I took a couple of grab shots but knew that i would be unhappy with them, I drove back and forwards for a while and then a small group landed in one of the front gardens and i managed a couple of better shots, Then i watched as more flew over my car and landed in the bushes near our communal pool then started to feed on the berries there, I slowly turned the car around and made my way to them, The didnt seem to mind and although still back lit they were in the open so i continued to shoot for about 10 minutes before a dog walker sppoked them back towards the church, I am about to go back out and will take the flash with better beamer just in case the light is wrong and i can light them with fill flash-fingers crossed,They say my head is in the clouds when its actually in the trees and bushes-Keep you eyes open-the migration will soon end as i have noticed buds on the trees and a sure sign that spring is on its way

Dave

Wednesday 25 February 2009

Reviews - Canon 50D - A quick hands on trial

Well as I mentioned on this trip report from last week, I was very grateful to Terry at Stratford Photo Group for the loan of his Canon 50D for a few days. Well I didn't use it a great deal, as I tended to go with my 1Dmk3 for the situations where I knew I needed to be sure of my handling of it.

However, it is a fine bit of kit and a body that I 'think' I would have as a back up body to the mark3 in my bag. Well why only 'think'? Well I didn't get a lot of shots out of it and essentially just in one set of light conditions, so I really would need to do a much longer trial before I would be prepared to give up my own personal thumbs up, as you will read below.

General handling was very easy, the only problem I found was down to user error. I use the back button focus method on the !d and have been for many years now. I had set it up the same on the 50D but was unable to find the option where you can switch over the Af-On button with the * button. Well it is there I found out afterwards, but it did cause me confusion when I was trying to grab focus on a Golden Eagle that was stopping down a hill towards me being mobbed by a Raven - so I missed that whole sequence of shots.

However, it did grab focus very well when the user got it right and gives sharp enough images - so no complaints there.

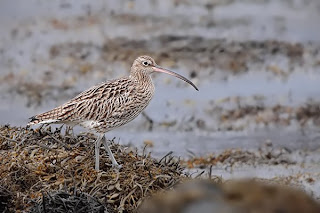
Curlew picture is a repost now I have processed it properly on the bigger screen. Light was awful and shot at ISO800 (see below)

File sizes are pretty big, jumping typically from about 12mb in RAW from the 1Dmk3 to over 20mb on the 50D, so card and hard drive management will be a little more demanding.

Now then the crunch question - higher ISO performance?

At ISO 800, which is a setting I am very happy to use on the 1D, the 50D files are quite a bit noisier with chroma noise. Now I have 100% pixel peeped and of course I appreciate that the 50D has 50% more pixels, but the noise was quite a bit more. I had set the in camera noise processing to be totally switched off so I could ensure a direct like for like comparison. But at these settings, I would need to use Noise software with the 50D whereas I wouldn't with the 1Dmk3. All the images I took were at ISO800 so I have nothing more scientific that that to compare. S0 it is this area that just leaves me with a little doubt.

The rear screen is fantastic and really wish I had that level of resolution on the Mark3.

There are plenty of reviews in much more detail all over the web and in various parts of the dead tree press.

I linked to this 50D tutorial a few posts back, so it is probably relevant to post again for you to get a much more objective technical appraisal than I have given here


Martin

Tuesday 24 February 2009

From the Archives-India-Ranthambhore


I have travelled to India many times, In 2000 i spent 3 months there and then went 2-3 times a year after, It became addictive, There is nowhere like it on earth and i hope it continues to be like that, You will not find a more diverse place with its cultures,people and places,It has everything from mountains to deserts,wetlands and forests, I have visited Ranthambhore,Kanha,Badhavgargh Keolado,and Kazirnaga national parks in search of Indias fantastic wildlife, I think i should take each Park seperatley as they are all very different and offer different things Ranthambhore NP in Rajesthan is my favorite Tiger reserve,Its not the easiest place to get Tiger shots-that falls to Bandhavgargh but there is something about the place that draws me back, Its a big place,very arrid-semi desert and extremely hot, I tend to go around march-may time,The later you leave it the hotter it will be but that will carry favour for you as the water dries up it will bring the tigers out looking for it-where there is heat and water there will be tigers, Nothing is guarenteed but i have always come up trumps here and on some trips have seen tigers daily whilst on others you may wait 4 days before seeing one,Tigers are not the only thing on offer here,Its the best place to see and photograph Sloth bear, It has large numbers of deer both Sambar (similar to our red deer) and chital which are similar to the fallow deer, Lots and lots of cheeky monkey's will keep the cameras clicking and stunning scenery,the park is built around a fort that is built high up on a rocky hill and it has large lakes with temples built around the place,The downside with all of this is that its the closest tiger reserve to Delhi-around 6 hrs by train so it gets busy and its also very expensive, But its not far from Bharatphur-keolado NP which is one of the worlds best bird reserves,Jaipur the pink city and also Agra is a short train journey away where you find the Taj Mahal and Agra Fort,They call this the golden triangle and its gives you options to make for a diverse trip, I stay in the Ranthambhore Regency-ask for Ravindra who will sort all your jeep and drivers out, Guides i would recommmend would be Rajesh and Hymraj-just remember a good guide is worth his weight in gold, I now have a friend who has set up his own business out there so if you are looking for a trip to Ranthambhore and the surrounding region drop me a line and i will forward it on

Dave

Monday 23 February 2009

Trip Reports - Mull - Day 4

So on to the last full day on the island. I woke up to dry conditions today, but sadly still grey.

While sitting down finishing off breakfast the first of today's White Tailed Sea Eagle was seen as it flew over the house in Dervaig.

I went to the south of the island today with Pam and Arthur who were doing a BTO Tetrad Bird Count.

En route, another two White Tailed Eagles were seen in separate locations, two separate pairs of Dipper.

For me, once I was settled down to my location, the photo opportunities were limited for a while although there were some great sightings of Goldeneye, Golden Eagle (three separate birds), and a female Hen Harrier amongst many other birds.

The best sight as I walked back to the van was a large Dog Otter coming across the loch towards me with a very large multi coloured fish in its mouth. Under the best cover I could achieve, and picking my moments to move while he was under water, I got myself as close as I dare to where he was going to come ashore. Laying down on the grass and stones with my camera and lens resting on the bean bag, he seemed totally oblivious to the sound of the shutter clicking.


Well I got a good few shots off but I have not been able to identify his lunch, a large fish with red and black parts and large white spots, so if anybody is up on their sea fish identification I would be most pleased if someone could let me know in the comments section.

After lunch, we pushed on further down the loch and had fabulous views of another female Hen Harrier, but much closer this time, with just a little sunshine too. Stunning views - too far for photos sadly, but great all the same.

So that is it for another short trip to Mull. I will be pleased to take a better look at the images when I get back on the large screen and with some better processing software to hand. And as I sit here and type this up, I am listening to Tawny Owls calling.

I have found some great opportunities for when I am back here in May, and look forward to seeing the summer migrants by then.

Update: - Well it seems like the Otter lunch was a Ballan Wrasse. Takes me back to when I was a small child fishing at Blackpool Sands in Devon with my father. Thanks to Alan Spellman and Arthur Brown from Mull for the id

Martin

Sunday 22 February 2009

Techniques-Image Elements

Too many times i have seen what could be a very good image ruined by careless technique and instead the image is soft or not critically sharp, A good sharp image is made up of various elements that must be taken into account before the shutter button is pressed, The exposure is made up of Aperture/shutter speed and ISO value-focal length of the lens also plays a big part and must be taken into consideration if the image is to be sharp,The weather is not always kind to us and on a miserable day high shutter speeds may not be available so what do we do, Say our guy has a 300mm f2.8 lens (lucky guy) he is handholding on a grey day, He sets the aperture to f8,He takes a test shot and checks his histogram which is good so he starts shooting but his images are soft and blurry-why because he is only getting 1/100 of a second and handholding a heavy lens with that focal length at a slowish speed is going to end in tears,What can he do to resolve the situation-he has choices, Firstly he can go to F4 which will give him an extra stop in speed (doubles it) so he gets 1/200 which could work or go wide open to F2.8 now his shutter speed doubles again and he is getting 1/400 now this should be good for handholding a 300mm lens but he now ended up with a shallow depth of field and will not get the effect he wanted-like all the bird in focus now he only has the head in focus-so what can he do-he sets his aperture back to F8 and adjusts his ISO,He looks and has set it to ISO 100 so but going to ISO 200 he has added an extra stop in speed so buy going to ISO 400 he will end up with 1/400 which is what was needed to get a good sharp image,The compromise here is that by upping the ISO it will add more grain or noise to the image,But as i say a grainy image is better that a blurry one and there are main noise reduction software packages on the market that can help eliminate noise, Many lenses now have image stabiliser/Vibration reduction which can give up to 4 stops of reduction so an image that needs 1/400 could be taken at 1/50 but this is only in theory-yes it definantly helps but should not totally be relied upon,When you are setting up think aperture,shutter speed,ISO and focal length and set up accordingly-Always try to use a tripod as that way you can use a lower shutter speed/ISO and get away with it

Dave

Friday 20 February 2009

Trip Reports - Mull -Days 2 and 3

Well the weather was very wet and the light poor for Day 2 which put some limitations on the photography options.

Nevertheless the wildlife was still out and I had some great spots today, starting with Treecreeper in the garden at Pam and Arthur Browns (of Discover Mull) garden. Locally in Dervaig Oystercatcher, Redshank, Curlew and Greylag Geese were in abundance. On the north west corner of the island at Calgary Bay, a couple of juvenile White Tailed Sea Eagles were hanging on the strong wind above the cliffs. As juveniles, they have not yet developed their distinctive white tail plumage. A couple of Ravens were not too impressed with their presence and flew at them shouting with their characteristic croaking calls.

A bit further round the coast and towards Loch Na Keal, a Dipper was seen at Eas Falls splashing around looking for food.

Near Ulva Ferry, the Golden Eagle I reported from Day 1 was seen again, and again being aerial bombarded by a very ambitious little Kestrel, which looked like a tiny dot by comparison with the massive wingspan of the Eagle.

Best spot of the day was a male Merlin who got under near me and flew off at great speed.

With the heavy rain of Day 2, the buzzards were pushed down and sitting on the wires or telegraph poles.

On the more sheltered bay of Salen and Aros, there were a number of divers, Great Northern and Red Throated, Black Guillemot and Common Seal. More Red Breasted Merganser were around along with Goosander which was sieving the surface of the water with it's sawbill, and also a male and two female Goldeneye were present. I usually come to Mull in May when these last two species have moved on so it was good to see them.

Fingers crossed for better weather on Day 3.

Well the weather didn't really get any better for Day 3- occasional dry but grey spells in between heavier rain or drizzle.

I covered the same loop of the north of the island again today, but saw a lot more. A total of 48 birds and 4 mammal species. Highlights of the day were many, but I guess it would be the Male Hen Harrier hunting, the two Golden Eagles, particularly the second one that was being heavily mobbed by a Raven and the two juvenile White Tail Sea Eagles.

I also had great views of more Goldeneye again as well as Turnstone, Ringed Plover, Curlew again and some close ups of a couple of flocks of Skylarks.

Mammals included Common Seal, Red and Fallow deer, and the obligatory rabbits. Sadly no Otter today.

I have been trying out a Canon 50D while I am here alongside my own 1Dmk3. Well I missed focus a few times today as I cannot switch back button focus from the AF to the * button - so a few swear words hit the Mull air. It is too early to tell what the image quality is like with this uncalibrated screen or on the other laptop. I will update the blog when I have had a good look on the big screen at home and let you know my findings. I certainly like the new rear screens on the latest breed of Canon cameras - very sharp.

Hopefully the weather will be better here tomorrow and I can get some more images, as the light today was again pretty poor and the images I have posted reflect that, sadly.

Martin


Techniques-Slow MO

I have always been a fan of panned-Motion type images and have tried it on many occasions, If things are slow then its a good time to practice your panning technique,You will need your camera set on a level tripod and then either use TV mode and set your shutter speed low or do as i do and keep in AV and adjust your aperture until the shutter speed drops to the value you want-or set it in Manual, I like the AV way as if anything suddenly happens you can quickly change the small aperture to a large one and get a quick shutter speed
The image here is of a swan taking off, I had been doing a project on the local Mute swans and had pretty much everything in the bag except a shot that really showed the power of the large birds so i decided to spend a day where i new a few swans were and set up and hope to get a panned image in the bag to finish the project off,Knowing what shutter speed to set is very hit and miss,The lower the speed the more dynamic the image but the chances of getting the shot with a sharp head is greatly reduced, The swan being a big bird and a larger target and slower meant that a shutter speed of 1/25 should give me the image i wanted ,If it had been a smaller faster bird like a coot then 1/100 or more would get the shot and not just a blurry mess


Another time i was sitting at a watering hole in South Africa, I had lots of shots of zebra,Rhino and wildebeest drinking and got some decent reflections but i wanted something different, 2 wildebeest came slowly down towards the water, i dropped the aperture down and slowly panned with them as the walked, It was taken with slide film so i had no idea what it would look like but i was pleasantly suprised with a very arty type shot,better than 2 bored looking wildebeest that would have been destined for the bin

Now panned-motion images are not for everyone-some people like them and some dont, If you are the type that like something different in your images then give it a go,Keep the ISO at base value and close the aperture to give a slow speed and keep it smooth as the shutter will be open when you are following your target so smooth is the word to keep i mind-Have a go and dont be too dissapointed if they dont come out as you want straight away-practice,practice and then practice some more

Dave

Thursday 19 February 2009

Trip Report - Day 1

Well after a long drive north through the night, it is a great pleasure to be back on Mull in Scotland. What a great start too - Otter after just five minutes after getting off the boat, thanks to a bit of advice. I watched a beautiful condition Dog Otter for about an hour, mostly through the binoculars. He did bring ashore a couple of fish but I was too concerned that if I got too close I would scare him off, but I did manage to get a few shots off. I will post them up a bit later as I cannot crop edit on this machine so will need to do a bit of jiggery pokery with another laptop.

Plenty of bird sightings including Red Breasted Merganser, Red Throated Diver, Eider, Black Guillemot, large flocks of Wigeon, Lapwing and Curlew.

Best birds of the day were the Golden Eagle and Buzzards. I had the pleasure of watching four Buzzards wheeling around in the sky display flying, and mock dog fighting. Followed about ten minutes later by a Golden Eagle who was also display flying, although I didn't see it's would be mate.

So a quick update as a taster, I am looking forward to a good couple of days ahead of me, although the weather forecast is a little iffy, but the weather does change very quickly here and sometimes the best forecast is not on the TV, but just outside the window.

Next update will be Saturday.

Martin

Wednesday 18 February 2009

Local Patch-Reflective mood


After Mooses comment last week i decided at the weekend to check out Lake Wheeler, Another largish lake about 20 miles from my home, Its obvious that some of the birds are fed here which is very unusual for NC, The Canada and Greylag geese walk up to you as you get out of your car as do the Squirrels, The coots are very friendly as are a couple of mallards so at least you know that you can walk away with some shots, After a quick recced with the wife and pup i decided that i would return on tuesday (yesterday) early, The weather here has turned back to a cold wind and the outlook for the week was not good but tuesday looked dry, It was a pleasant suprise to arrive at a mirror calm lake and that there were some birds around, I quickly set up with the rising sun on my back and took a couple of tests shots of the closing in coots-making sure that the beaks were not blowing out, The coot is a difficult bird to expose for as its beak is soo white so i only tend to shoot these very early/late in the day or on overcast days and dont waste my time otherwise, They are very aggresive birds and like to spend the day fighting with the neighbours so action shots are always a possibility, Yesterday i spent the first hour trying to get some nice reflection shots which came out ok, The crows spent the morning attacking a hawk that once landed directly above me and then swooped over my car as i was leaving, Lake wheeler has an added bonus of a cafe so you grab a cup of coffee to warm you up and it must have the cleanest toilets in NC, All in all a nice place to spend a few early hours


Dave

Tuesday 17 February 2009

Reviews and a bit of News - Canon 5Dmk2 and other stuff

OK a few bits and bobs for you today, gathering up a few reviews and videos.

I have to say the images that I have seen from the 5Dmk2 look pretty stunning, but then again there was nothing much that wrong with the old 5D. It certainly gained a cult following. I owned one for a while alongside my old 1Dmk2N and it used to provide significantly better images in many circumstances. the AF system was clearly never going to be a patch on the 1D and I was never happy to shoot in the rain as I did on many an occasion with the 1D.

Anyway, I would like the new 5D but given the current financial situation - thanks for that Mr Brown by the way, you might blame the US, but most of us here blame you. OK politics over.

Here is a full detailed review from dpreview so I will let you all make your own minds up on that one. Certainly, the video option appeals for me simply for this reason. There are many times when shooting stills of our subjects we see some wonderful behaviours. It is as times like that I would love to just press another button and capture some moving footage, and then just quickly click back to still mode. OK so I will have to wait.

It seems that a few models succumbed to harsh weather conditions in the Antarctic recently judging by this post from Luminous Landscape . I wouldn't be to worried about the authors comparison with the Sony Alpha as there were only two on the trip it seems, so hardly a representative sample. I would be good to hear from Sid Jervis how he is getting on with his, as I know he has been giving it a run out in very low temperatures in Canada, so if you are reading this Sid, comments would be welcomed.

A good friend, Dave Newton who works with Canon has recently being showing off his latest movie star Hollywood style on the the Canon Professional Network with a interesting set of videos on the 5Dmk2 and also the 50D.

I have manage to blag a 50D from a friend for a try out later this week. I am hoping to be catching a bit of wildlife photography later this week, so will see how it pans out with some of the more distant stuff and see how it compares with the 1Dmk3.

Finally, some good news from a Politician - yes very rare I know, and I did say politics was over earlier, but if this does get away then it will be good news for wildlife in the UK. When I read last year the the 'set aside' programme was coming to an end, I was very upset as this has proved to be a major lifeline to our farmland wildlife, that is still very much under pressure. But this story on the BBC gave me cause for a little cheer. Lets just hope that they do deliver on it, and it is not just yet another round of spin. But I really am trying to set aside my own cynicism and hope this one comes off.

Monday 16 February 2009

Being a wide Boy

We have mentioned long lenses a few times and they really are the main arsenal of the wildlife photographer, But its not the be all and end all and wide angle lenses play a very important part as well, Not just for landscapes but to show a different perspective to your normal image and to help show the animal in habitat, I love it when i get an opportunity to shoot with a wide lens and am at present putting corn out next to my hide/blind in the hope that a deer will come close enough whilst there is enough light to photograph it with a wide angle lens, To use wide lenses you need the camera/lens to be very close to the subject,You can do this in a variety of ways, Use a remote release cord with extension so that you can tuck yourself out of the way and not spook the animal,Use a cordless release or just find animals that are used to humans and approach very slowly

In this image i took of a Red Squirrel (same place as martins squirrel images) i used a Canon LC4 (Now a LC5) Which can fire a camera up to 100m away, I placed the camera/lens on a beanbag and put some peanuts in a crack in the tree stump and waited for the squirrels to come for a feed,The sound of the shutter made the squirrel curious and he came and looked right into the 16-35 that i was using, I had a long lens on the tripod so i could get both types of shot

In this image i was in Yosemite NP in California, It was my first trip there and we found some Mule deer close to the road, I didn't know how the deer would react so i started with a 500+1.4x and made my way closer,Take of the 1.4x and move closer,ok now take the 500 off and put on a 70-200 and move closer,wow the deer is taking no notice and not showing any signs of stress so move closer and shoot at 70mm, Now this is ridiculous-take the 70-200 off and put on a 16-35, I lay down flat and move commando style towards the deer, The deer knows i am there and i speak softly to it all the time, In the end it comes over and stands over me,eating all the time before moving off and crossing the road,I had positioned myself to get El Capitan mountain in the background-great stuff-if only there had been a blue sky
So don't be blinkered when it come to shooting wildlife-try to get different shots from different lenses

Dave

Sunday 15 February 2009

Local Patch - Warwickshire

Sitting in The Old Schoolhouse at Smethwick Photographic Society, I am totally surrounded by photographs today. The Midphot exhibition is being unpacked around my ears and I have just sat through over 250 prints and soon to be starting on more than 500 digital images of the RPS Nature Group Exhibition judging. Has been great to see some fantastic work in there.

Anyway, on to the main theme of the day, my fortnightly local patch update.

The cold weather with sharp frosts and snow has provided some challenging conditions for our local wildlife. The garden birds have cleared us out of a sack of sunflower hearts and another one of mixed seeds since I last wrote. We have regularly seen up to 30 Blackbirds and even more House Sparrows on a daily basis. Grey Wagtail is still regular, and staying for lengthy periods now. We had the occasional visit from Fieldfare and Redwings during the harshest conditions which was a pleasant interlude. Song Thrush is now a regular morning caller for us too. I am always happy to be woken by it's song.

On a rarer front, we were thrilled to see a Male Reed Bunting on the ground feeder. We had only previously seen this just the once, the image was take last year on a feeder, through glass, so just a mere record shot.

Sue rang me up this last week to tell me that we had also had a beautiful female Kestrel in for a while too, on the ground and posts, much to the consternation of the little birds who dived into the air raid shelters to hide.

Further afield, there have been regular Diver sightings at Draycote Water and Bittern at Brandon Marsh. Details can be found from BirdGuides.

Journeys to work these last two weeks have seen more very early sightings of a number of raptors as they have struggled to find additional food in the snow, including very early Buzzard, Kestrel and Barn Owl, and a few sightings of Tawny Owl too.

Right I had better get back to work here now

Martin

Saturday 14 February 2009

Gear we use and abuse-The little things

Its not just the sophisticated camera bodies and super sharp lenses that help us to make an decent image, There are some small unsung heros that play their part, Here are 3 items that i guarentee will improve your images

Item 1-The Double Bubble
Placed in your hot shoe you will have perfectly straight horizons and level lakes and wont need to crop your images or tilt your head when looking at them, Use for all your photography not just landscapes


Item 2-The remote release
Dont suffer from camera shake again as you wont need to touch your camera,Compose you image and make sure that the camera is locked down and press the remote without touching the camera/lens and viola a perfectly sharp image-obviously you cant use this for say birds in flight but for a lot of your photography this will be a god send,


Item 3-The off camera flash cord
Sick of getting red eye(squirrels and people) green eye (cats-tigers etc) or even white eye (badgers) well if you move your flash away from the cameras focal plain then you wont, The remote release cord will give you the freedom to move the flash away from the camera and give different lighting effects but the main one is not to have coloured eyes,Here you can see it with the flash on a special wimberly bracket attached to my wimberly head and sitting above the lens which means i can go from landscape to portrait without moving the flash-of course you can simply just hold the flash high in one hand and shoot with the other-either way it will improve your images when using a flash gun

Friday 13 February 2009

From the Archives - Red Squirrels at Formby

I met up with a number of other wildlife photographers last night and was extremely saddened to hear of this story and also here. So it was with that in mind, I thought I would share some images from a trip I made there about two years ago.


Sue and I got there quite early, having previously photographed some hares a few miles away. We set up in a particular area, on the other side of the road to the squirrel walk, having put down some hazel nuts in a few photogenic places.


It didn't take long for our first visitors to show up, but they weren't red.
So we used the opportunity to get images like this of Great, Coal and Blue tits, and very handsome they look strutting their stuff in the early spring sunshine.

After about 45 minutes or so, the first of the little Reds came bounding across the ground towards us, looking very cheeky and mischievous. It didn't take long for it to find the goodies we had put out. Unfortunately, the first one didn't stay for long, as a loose dog came running through, ahead of its owners who seemed completely oblivious to us, or my profanities at the dog.


However, within a few minutes of the all clear, it came back and was joined by three of its friends who ran around us for about an hour or so, even getting closer than the minimum focus distance of the 500mm, which is 4.5m.


At one point, one was eating from the supply of nuts that was in a bag that was hanging from my tripod gimbal head, as I was using the 500 hand held at the time. It made me laugh anyway. Wish I had taken a picture as I think I must have had my serious head on and was looking for more specimen shots.


Well let's hope these little creatures can fight this dreadful disease off, but sadly the omens do not look good at all.

Martin

Thursday 12 February 2009

Hardware - Dell 2407 Monitor


A decent monitor for you PC/Mac is very important especially if you do work for agencies or even for club events where the world will see your images. They have to look 'right' so the screen needs to be properly calibrated so the colours that you see on your screen are the same as the colours that your agent or the printer will see. When I upgraded my old Dell PC to a new one i decided that it was time to invest in a decent monitor. You can pay huge amounts of money for the likes of Eizo or Lacie,These were out of my budget but I have friends and family that have been using Dells own ultasharp screens and in particular the 2407wfp (now the 2408) its a 24'' wide screen monitor and all I can say is its a great screen that doesn't stretch the bank too much especially if you buy it at the same time as the PC. It may seem expensive compared to the bog standard screen that you get normally but it has some nice features.
Firstly it has built in USB2 ports, TV, Video and speaker outputs and on the left hand side as you look at the screen it has card slots so you can plug the card from your camera directly into the screen and download from there-all very handy. Another nice feature is that you can swivel the screen from landscape to portrait and the images changes to suit-all things that you don't get on the cheaper screens that come with a PC package.

If you want to get one of these screens its not always cheaper to buy direct from Dell and I have found that www.overclockers.com do extremely good deals on Dell screens. I have had my Dell screen for about 18 months now and I am extremely happy and impressed by the image quality and value for money. A good way of knowing if you are happy with something is to ask yourself would you buy another and the answer is-yes I would.

Dave

Wednesday 11 February 2009

More News - Nature's Great Events

Don't forget to check out BBC 1 at 9pm tonight (if you are in the UK) for the first of the exciting new series Nature's Great Events.

The HDD recorder is set for a keeper on that one

Martin

News - EOS Forums Update

The EOS Classifieds is now back up and running. But sadly there is no further news on the Forums site. It is still the much larger database that is causing the problems.

So keep checking by.

Short post today as I have to dash off to a meeting tonight, but the little Samsung hooked up to Vodafone 3G mobile broadband is doing it's stuff

Proper post back tomorrow.

Martin

Tuesday 10 February 2009

Software-CS4/Lightroom Adjustment Tool

Now i am the first to admit that i am not good at processing-OK but definantly not good, This i proved to myself yesterday whilst going through the last of my images for my new website-Red Fox, Now foxes are my favorite animal, I dont know why but i love to photograph them and i have more fox images that any other mammal, Last year was a bumper year for me spending 3 months watching very small cubs growing up, Most of the photography was done in low light with a Canon 1D MK3, I dont know why but the images were quite flat as RAW files and although the foxes in Switzerland seem lighter than other places where i have seen them i could never really get a result after processing that did the fox any justice, As i mentioned in a previous post i have recently purchased a book on CS4 for nature Photographers and going through that and the attached DVD i thought that i would give the new Adjustment brush a go-WOW is all i can say,Layers made easy, Layer masks are something i never really got to grips with and Martin did show me a couple of times, Basically its where you isolate a part of the image and do localised adjustments to it without affecting the rest of the image, The new Adjustment brush does this without the need for making the image black and painting it back in, So first off open a RAW image and do any normal adjustments i.e exposure,colour temp etc then with the fox image i hit the adjustment brush and 'painted' over the fox, I ticked the auto mask feature to keep the brush strokes within the bounderies of the fox outline,if you do go over there is an erase button that you then can go back and paint out the area you dont want doing, once i had painted the fox (i set the exposure for -0.5 as i wanted to darken it) i ticked the show mask which then made the fox white and shows any areas where i had missed which i quickly painted in,Once i had done this i ticked the erase button and painted the eyes back in as i did not want to darken them, i moved the exposure to a setting that looked right which ended up around -0.4 and then added some saturation-remember this will only affect the part of the image that is 'painted' once i was happy i then repeated the process just taking in the eyes and i lightened then a little by adjusting the exposure to +0.25 and a little saturation, If shooting a landscape you could do this on a mutiple areas,If you tick the show pins box every time you add a new ask a pin will appear on the area that you have done so if you have made 5 masks on different parts of the image you can click on a pin and it will take you back to the settings applied for that part and if needed you can readjust them-all very easy to use and well shown in the DVD with the book, Once you are happy with what you have done just 'open' the image into CS4 and apply any extra processing needed i.e curves ,sharpening etc,Look at the 2 images below,The top one is from last year after my usual processing and the bottom one is from yesterday after using the adjustment brush


Its a tool that will now become part of my workflow, I know that Lightroom has the same feature and is the cheaper option if you are looking for software with it

Dave

Monday 9 February 2009

News - Just a quickie

OK just a quickie today as I am deep up to my neck insetting up my latest acquisition - Samsung NC10 Netbook. Thanks to some feedback from Joe Fox in this blogpost I pushed the boat out and bought one of these from Amazon.

Well what a little baby it is, but no lightweight in terms of capability judging by the specs. It comes with 160GB HDD, partitioned into two, one for the OS and apps, files will go on the other section.

So I have ditched the installed McAfee and uploaded Kaspersky Internet Security 2009 - great deals at the moment on three licence version, so did the other laptop and one of the kids PC at the same time. Firefox is on, shortly to be followed by Thunderbird and Skype.

Breezebrowser will also go on so I can do some basic stuff with my files while I am mobile.

I also bought the 2GB RAM chip at the same time, plus a neat little TechAir bag.

So I will give it a decent test drive over the next few days and weeks and do a more detailed review, but looks good, with excellent reported battery life. So I shall be blogging on the move now and not limited to when I get back to base on the large desktop, and really make the most of Web 2.0

Martin

Sunday 8 February 2009

Local Patch-Yates Historic Mill


We are having a mini heat wave in NC and the last couple of days have been glorious-sunny and hot enough to think about shorts and tee shirts,How different to a couple of weeks ago when it was freezing and with snow, I spent yesterday afternoon looking around Lake Jordan hoping to get a nice sunset or 2, Although the weather played ball i just could not find a place to shoot that had any decent foreground interest or a nice small island or similar for a silhouette, I ended up driving around 70 miles-its a big lake, But the time wasn't wasted and i did make some notes for future reference, I decided to get up early and go to Yates Historic Mill, An old mill as the name implies on the edge of a small lake,Very picturesque, The place doesn't open until 8am although i have been there a few times and the gates have been open earlier,Today it was 8am so as i was early i checked the fields and ponds close by, i did see some deer but even distant they soon headed for the woodland so i went back and took a shot of the dam from the road, When the gates opened i went in and hoped to get a better angle of the Mill and Dam in the early light but i was greeted with a construction sign saying that the mill and creek area were out of bounds until the construction had finished so i grabbed the long lens and sat under a tree hoping that the Buffleheads or Hooded Mergansers would come over, The hoodies didn't but the buffleheads gradually came closer, Not as close i would have liked but i had a good view, They started to get aggressive towards each other when a female arrived and i managed some action type shots-nothing spectacular but good to see and i have now learnt a bit more of their behaviour so next time i will be ready, Apart from the lake there are a couple of trails which are worth a look as i have seen deer on most occasions as well as plenty of different bird species, I will go back after the construction has finished to get the landscape shots i missed today


Dave

Review - Look back at our First Month

Well it was a month ago that we launched Wildlife Photography across the Water so I thought I would just have a quick look back at the stats. and see what we have achieved.

We have managed to post every day so far and hope to continue to do so, although there will be times when we will no doubt 'have a day off', but that is one of the benefits of two of us writing.

We have included news, reviews, views, trip reports, gear we use and abuse, long lenses, software and some work from the archives. We still haven't started our guest photographer slot, but expect to get that off the ground this month.

Looking at the numbers, we have had 2,216 visits from 637 different visitors from 37 different countries from all continents except South America. 47% of you don't use Microsoft's Internet Explorer with Firefox being the most popular and 11.5% of you using Macs and 1.2% of visits from an Iphone.

So many thanks to those of you who have visited the site and continue to support us. We have had a couple of comments with some specific requests, which we have now covered in the Lenses section and also metering.

If there are any topics you want us to cover, please feel free to ask and use the comments section, we welcome all feedback.

Martin

News - EOS Forums Update

Sorry to report that there are no further updates on when the Forum gets back up.

There are tech problems with the new server not hosting database files in the same way as the old server and it is taking ages to resolve this.

Keep checking back and if any EOS'ers want to use the comments to communicate among yourselves, please feel free. Just use you EOS name somewhere in the message so we know who you are.

Martin

Saturday 7 February 2009

Reviews - Ameristep Doghouse Hide

Well as I was looking out of the window this morning mulling over what to write about today, I looked at the snow still sitting on the top of my hide and thought I would share my experiences of the hide with you. At the last house I lived at we were lucky that we backed up on to a line of woodland that was home to a wide range of bird species, and too many grey squirrels unfortunately. Unfortunately to get the best views for photography, I had to go past the feeding area and look back towards the house. So I needed a hide (or blind as you US guys) call them to make life easier to get the birds in and also sit down in a bit of comfort.

When I bought this hide, there was a limited choice in the UK and the prices were quite expensive. So a trip to ebay established that I could get the Ameristep hide delivered to my house for about £70 compared to the £155 or more that it was available for from UK dealers.

So why this hide? A number of reasons really. Firstly, it is constructed to be very fast to put up/put down as each side is supported by wire bands. So it pops up like a studio reflector. Well it is a bit of a wriggling octopus to put away until you have done it for a few times, so watch your face when it decides to fight back.

The great thing about this style of construction means it folds up to a very small size and goes into it's own backpack.

The pack comes complete with a small bag of eight pegs so that you can peg down each corner at the base and the corner guy lines, which you do need to use if you are leaving up for a period, as it does move about it the wind without them fitted.

In addition, there are two fibreglass poles, that are used to support the roof to avoid any puddling.

It has one large door on the back, see photo below, and then other three sides have a large zip down window that goes across the whole width, which is useful when there are two of you in it, and it is big enough for that. You can also see on the first image that there is a small port in the main window as well. When I am using it on my own, this is sized perfectly for either the 300f2.8 L or 500f4L lenses, allowing just a little panning movement.

One word of caution - they do get very warm in the summer, so dress accordingly and of course they will fade over time as the UV breaks the colours down.

There are other options of hides that are now available including from Wildlifewatching supplies and also Ultimate Nature Gear. There is usually a link for Ultimate Nature Gear in the Google ads on the right hand side of the blog, so check them out, they have an exceptionally good range from one to three person hides.

One of the very useful options in the field is a bag hide, which I bought from Kevin at Wildlife Watching Supplies. I will be making good use of this in a couple of weeks time, so I will get some pictures and do an update after that trip.

I know that Dave have set up some more permanent options in the past for photographing fox and badger so he will no doubt tell us about that some time in the future.

If you have any other great hides or blinds that you use, please drop us a reply in the comments

Martin

Friday 6 February 2009

From the Archives-Sumatra


There is nothing like going through old images to bring back memories, I am in the process of having a new website built so am going through all my images to see what's good enough to show the world, In 2000 my wife and i travelled around South East Asia as backpacking photographers, Our aim was to photograph Endangered wildlife whilst they are still around, We managed to get some good stuff from Orangutans to Rhino,Elephant and Tiger to name but a few, We did this backpacker style to keep the costs down and allow use to travel to India,Thailand,Singapore,Malaysia and Sumatra-Not bad on a very small budget, Sumatra was an unknown for us-very little documented but if you dont go you wont know so we jumped on a boat in Peneng Malaysia and headed over,We loved it soo much that we ended up going back 3 times spending just over a month there in total, We stayed in Gunung Lesser National Park and each day walked into the Jungle to a feeding platform and hoped that Orangutans would show up-they did everyday and we also viewed White handed Gibbon and leaf monkeys, A truly fantastic place that still seems to be hidden in the backpackers books and not a tourist destinantion like Borneo, Being a backpackers destinantion means that accomadation is cheap but basic-just enough of what you need and no more, Photography wise you do not need huge lenses-300mm will get full head hots if you hang around the rehab centre there as orangs come and go as they please, 2 things i would recommend-1 is a flashgun as orangutans faces are very dark and few images taken without one will work as the eyes will be lost in the dark face, I would use AV mode and set you flash to around -1.5 so its just enough to lighten the face and thats all, You are in a tropical rainforest so it will rain-A LOT, so protect your kit,Its not just the rain as the humidity is very high, I washed some underware and hung it outside and a week later it was still wet!!! So also protect your self not just from the mozzies but the dampness-medicated talc and caniston cream keep ring worm at bay-i know this from experience, Sumatra is a very very cheap place to visit and one place thats at the top of my places to go back to-around june-august is best

Dave

Thursday 5 February 2009

Reviews - Permajet Printing Papers

Over the years I have, probably like many others, had my trials and tribulations with the expensive business of using inkjet printers. But once I got over the science of colour management, as it seemed at the time, and I was getting vaguely similar results on paper to that seen on the screen, I thought it was time to start looking at the different paper options available to me.

I started off many years ago with an A4 Epson something or other, but binned that for a Canon after a year or so, as I was fed up with the rate it was getting through a combined tank of colour ink, and probably leaving lots of unused ink behind. So I got a separate ink tank Canon A4, but once I started turning out Exhibition and Photo Group work, I quickly realised that A3 was the way to go. I was taken with the Canon Pixma Pro 9500 when it was announced, but they seemed to take an age at getting round to launch it, for various reasons. So I got the 9000 version instead. This has been my workhorse for the last two years, and what a stunning printer it is. I know that a number of others have bought it following various discussions we have had.

As great as the printer is, the Canon papers are a little more variable in my opinion. The high gloss Premium Pro is excellent and I have never found another paper to beat it (although I need to test out the new Canon Platinum yet). However, my requirements for high gloss are quite limited and for my wildlife imagery I prefer either semi gloss or matt. Now the Canon papers aren't bad, but I was sure there were better papers available.

This was when I started looking at Permajet papers, following a visit to Stratford Photo Group a few years back. Permajet have a stunning range of papers ranging from digital photo range through to smooth and textured fine art and a stunning range of fibre based under the generic title of traditional baryta.

For natural history prints, I need to use the digital photo range consisting of the Oyster, a semi gloss paper and the matt plus which is self explanatory. These papers are not only extremely good value for money, certainly if you compare to the Canon and Epson own brand equivalents, they are as far as I am concerned of superior quality when the ink is laid on them.

Now while Permajet will supply pre prepared ICC profiles for the Epson range, they have not done so with the Canon 9000 and 9500 range.........yet. However, they now have all their papers with test patches prepared so that they can be uploaded to their site, which should be happening very soon, as I have prepared them all for them.

The service support from them has been excellent. Vij Solanki there has done a great job for me in the past, and even turned out a profile and emailed it to me so it was there when I got home - and I only live seven miles from their offices.

When all the profiles are uploaded, I will drop a quick news update blog post for you.

So great value, very reasonable prices and as far as I am concerned all the quality that I would expect or need from a paper to suit traditional wildlife image printing.

I do use other papers from their range for my landscape work, generally a warm tone Omega for colour work, and the fibre based papers for monochrome, which both given stunning results. Both of these papers are not cheap, but the results are worth it for me.

I have recently been using the Canon Pixma Pro 9500 and have carried out some extensive testing - but that is another story for another day.

If you are planning to go to Focus on Imaging Show later this month at The NEC, then drop by on the Permajet stand in Hall 9, Stand E41 and tell Vij I sent you - not that it will help you :-) But do have a look at the range and quality of the papers, and if you haven't colour calibrated your monitor, and I am sure there is probably no-one left anymore that doesn't (joke) then they can sell you a good range of calibrators too.

Update: ICC profiles for all the Permajet range for the Canon Pixma Pro 9500 can now be downloaded from here. I will do a further update with the 9000 profiles are available

Martin

Wednesday 4 February 2009

Software-Breezebrowser PRO

Sometimes something comes along that makes your life a lot easier for very little money-it doesn't happen very often but when it does take advantage. Many years ago when I changed over from film to Digital, I heard of a software called Breezebrowser, I checked it out and bought it. Wow is all I can say-fast is another word. If you get fed up waiting for your RAW files to download then get breezebrowser. A 4 gig card downloads in less than a minute right before your eyes. Its quite an old programme that has never been beaten as far as I am concerned. You can use it to process your RAW files, I don't, I use it for browsing and deleting my days shoot, then quickly batch rename-takes a second and then copy them into a file for processing in photoshop, breezebrowser used to have a couple of problems. It was Canon orientated and for PC use only. Well the first has changed and i can use it with my Nikon gear but its still PC only which is a shame as friends of mine who have macs and have seen me use Breezebrowser would love to have it.

So you open breezebrowser and click on the cardreader to open the file and in seconds they are in front of you
I then highlight about 6-10 images and press Crtl S and i get a slideshow of those images, I make a note which ones don't make the grade and press Esc to bring me back to the main page and then delete those I made note of,Of course you can go through each image individually.

If you bring an image up on its own and press Esc you can see the focus point as shown here along with equipment used-body, lens etc, Shooting data and Histogram.


Now if you have a sequence of images which is very possible but you need to just keep the very sharpest you can check up to 4 images together by selecting 4 images and pressing Ctrl Z then with the scroll wheel on your mouse you can zoom into say the eye and see which is the sharpest of the bunch like here.


All extremely quick and easy to use, batch numbering takes seconds and over all its the easiest system have come across. Most people that i have shown have gone straight out and purchased it. Also check out some of Breeze systems latest offerings allowing you to control your camera functions via a pc for remote shooting-looks cool and something I may invest in. I can't recommend Breezebrowser PRO enough, if you want to use BB for all your workflow then Arthur Morris does a paper on it which you can buy from his site.

Dave

Tuesday 3 February 2009

Long Lens - Part 4 - Protection

So you have shelled out loads of money and bought your cherished big lens, and you now have a zonking great big white or black lens that will attract plenty of attention - learn to live with it.

However, you might want to be a little less obtrusive if only to the wildlife - so what options do we have?

Cheapest option has got to be tape - I have seen black gaffer tape all over lenses, or maybe you might prefer some camo tape. Make sure that if you go this route you think about how you are going to remove any sticky residue. However, this simple and cost effective solution does work. I know Dave used it for many years on his Canon 500F4 IS L, and that it did the job and was as good as new when removed and cleaned up.

I opted for the neoprene LensCoat for my 500 when I got it a couple of years back. If you are in the UK, you can get them from Warehouseexpress.com, there is usually a link in the Google ads on the blog.

As you can see from the image, these are made up of a number of elements, that are a bit a tight squeeze to get on, and they do leave gaps usually at the junctions of the moving parts. Additionally, you get a clear window over the controls so you can see what you are adjusting easily - you will note that my distance limiter was set to 4.5 - 10 m, as I had been trying to get some images around the reflection pool in my garden.

Below the 500 is my 300f2.8 with the Wildlifewatchingsupplies version.

As you can see these sections butt up to each other and there is no clear panel, which is a bit more of a pain, but the benefit is that this system is much cheaper for UK buyers certainly as it is UK made. It makes it a little stiffer to swivel the lens on the mount when going from landscape to portrait mode, but I think part of that problem is a different design of mount as well.

Now my main reason for buying these covers is simply to protect the lens from knocks, bumps and scrapes, particularly when operating from hides and the car (and protect the car paintwork too). The Lenscoat is less good at dust and weather protection due to the gaps, but that is where the next system comes in.

Again at exceptionally good value for money from Wildlifewatching supplies are the lens and body covers. The image to the left shows the lens cap, main lens cover and body cover. These are the double sided versions to give some decent weather protection. I use these when there is rain, dust or spray about. The lens hoods are particularly good, as I quickly realised that I was going to lose the Canon plastic clunky cover, and at that price it was something that I did not want to do. These hoods are in the early teens of pounds, so not the end of the world when I lose it - and I have already once.

Finally, the best protection is to keep it in your bag when moving from location to location. Dave has already shared how he does it in this blog. In the next part of the Long Lens series, I will share details of my custom made '500 with lens hood fitted the right way round, plus body, ready to shoot straight out of the bag' bag

Martin